Cosplay: In Before the Retcon


*Waves* Hi guys. And a happy short work week for those who were lucky enough to have Monday off. The past few days have been excellent, but simultaneously jam-packed and that trend is scheduled to continue for at least another week. Last weekend the GIR and I got to experience Anime Boston for the first time (courtesy of our friends at Asmadi Games). While we felt a little old, the average age of attendees was maybe 16, and the Hynes Convention Center is less conducive to large crowds than the BCEC, which hosts PAX East, the event itself was a lot more fun than we anticipated it would be. The overall vibe of the convention was enormously positive, Artist's Alley was particularly striking, and there was a wealth of interesting, energy-filled events. While some of this enjoyment is likely due to the fact that the GIR and I are in convention deficit, since our transoceanic sojourn earlier this year ate up the vacation time that would normally go to Gen Con, Anime Boston impressed us enough that we'll likely add at least 1 day of said goodness to the convention docket for 2014.  You can check out pictures from the halls of the Hynes on our Facebook and G+ pages.

Wandering about the convention was loads of fun, but I felt distinctly discomfited not being there in costume. Anime Boston boasted an enormous number of cosplayers and a myriad of costumes ranging from the wholly homemade to semi-professional and I found myself itching to join their colorful ranks. The GIR and I found out we'd be headed to Anime Boston about 2 weeks before doors opened, so it wasn't possible for me to toss something together or repair an existing costume in time.

Really? You didn't have anything on hand at all?

Ok, it wasn't that there was no costume to be had. A more accurate appraisal of the situation would be that my costume-making attentions were decidedly elsewhere.

Elsewhere? But three paragraphs back you mentioned you had no other conventions to attend this year.

This is true. +5 points for being observant. Here's the thing though, there will be costumed celebrations as part of that whole me turning 30 business. Said revelry is going to be centered around one of my favorite properties of all time: Star Wars. There have been a couple mentions on here of my now decades-old obsession with all the things from a galaxy far, far away. Naturally, there was little debate as to the theme of a sizable birthday bash.

It so happens that these plans are coming to life mere months after the announcement that we'll be getting a new trilogy in the next couple of years. This is, of course, all sorts of exciting in its own right, but fans whose purview reached into the Expanded Universe crooked an eyebrow. Would the new movies adhere to what we'd considered canon for the past few decades? What few snippets of information we've received thus far seem to indicate that no, said films will likely exist in their own continuum.

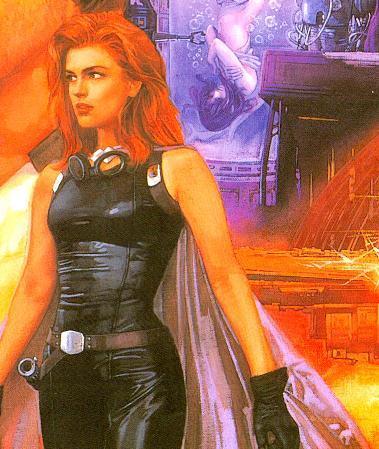
Given this potential that some now long-established characters could very well be retconned out of existence, I wanted to pay special tribute to the EU by recreating one of its best-known inhabitants and my personal favorite non-cinematic character: Mara Jade Skywalker. 

Assassin, slicer, Jedi Master, and all around badass
 Heir to the Empire was my very first foray into the Expanded Universe and I distinctly remember crossing my fingers when I'd finished the text in the hopes that Mara Jade would make additional future appearances. Up until that point there was Leia, Leia, Leia, and maybe a minute's worth of Mon Mothma. That was it for compelling female characters in Star Wars. The introduction of a super-competent fiery Force-sensitive assassin brought a grin to my pre-middle-school face. I've been wanting to cosplay as her for quite some time and am thrilled to get the chance.
    
If this costume had been for a convention or if I'd had additional time to prepare, I would have made the entire ensemble from scratch but, with only three weeks before the party, a little pragmatism had to come into play. In all likelihood, I'll revamp this costume for future use.

Mara Jade has a handful of highly recognizable trademark outfits. After examining each, and incorporating some input from the GIR, I decided to go with this from the Emperor's Hand comic series.

The costume has only a few base components: jumpsuit, cape, utility belt, goggles, and gloves. Each of these features a few key details that makes them distinct. Unless you are determined to make every item from scratch (which itself is entirely possible with this costume), it's not a terribly demanding project.

Jumpsuit: If you are going to a competition, a major convention, or are trying to obtain approval from a semi-pro costuming group like the Rebel Legion or the 501st you will have to make the jumpsuit from scratch. Why? Mara's jumpsuit has some distinct cording/piping that runs throughout the garment and is tough to find on ready-made pieces. Pam, of she-who-makes-lekku fame, has a some fantastic tips if you are trying to re-create this effect on your own.

If you're not aiming for quite that level of detail or are running short on time, you can purchase a jumpsuit. Just about any black full-body cat suit will do the trick so long as said piece has a zipper in the back or at the side. I purchased this literal cat suit from Amazon, then removed the hood and sleeves by cutting apart and rebuilding the joining seams. Major online retailers like Amazon carry a wide array of similar garments. EBay also has a few great suits, including this pricy but accurate entry.

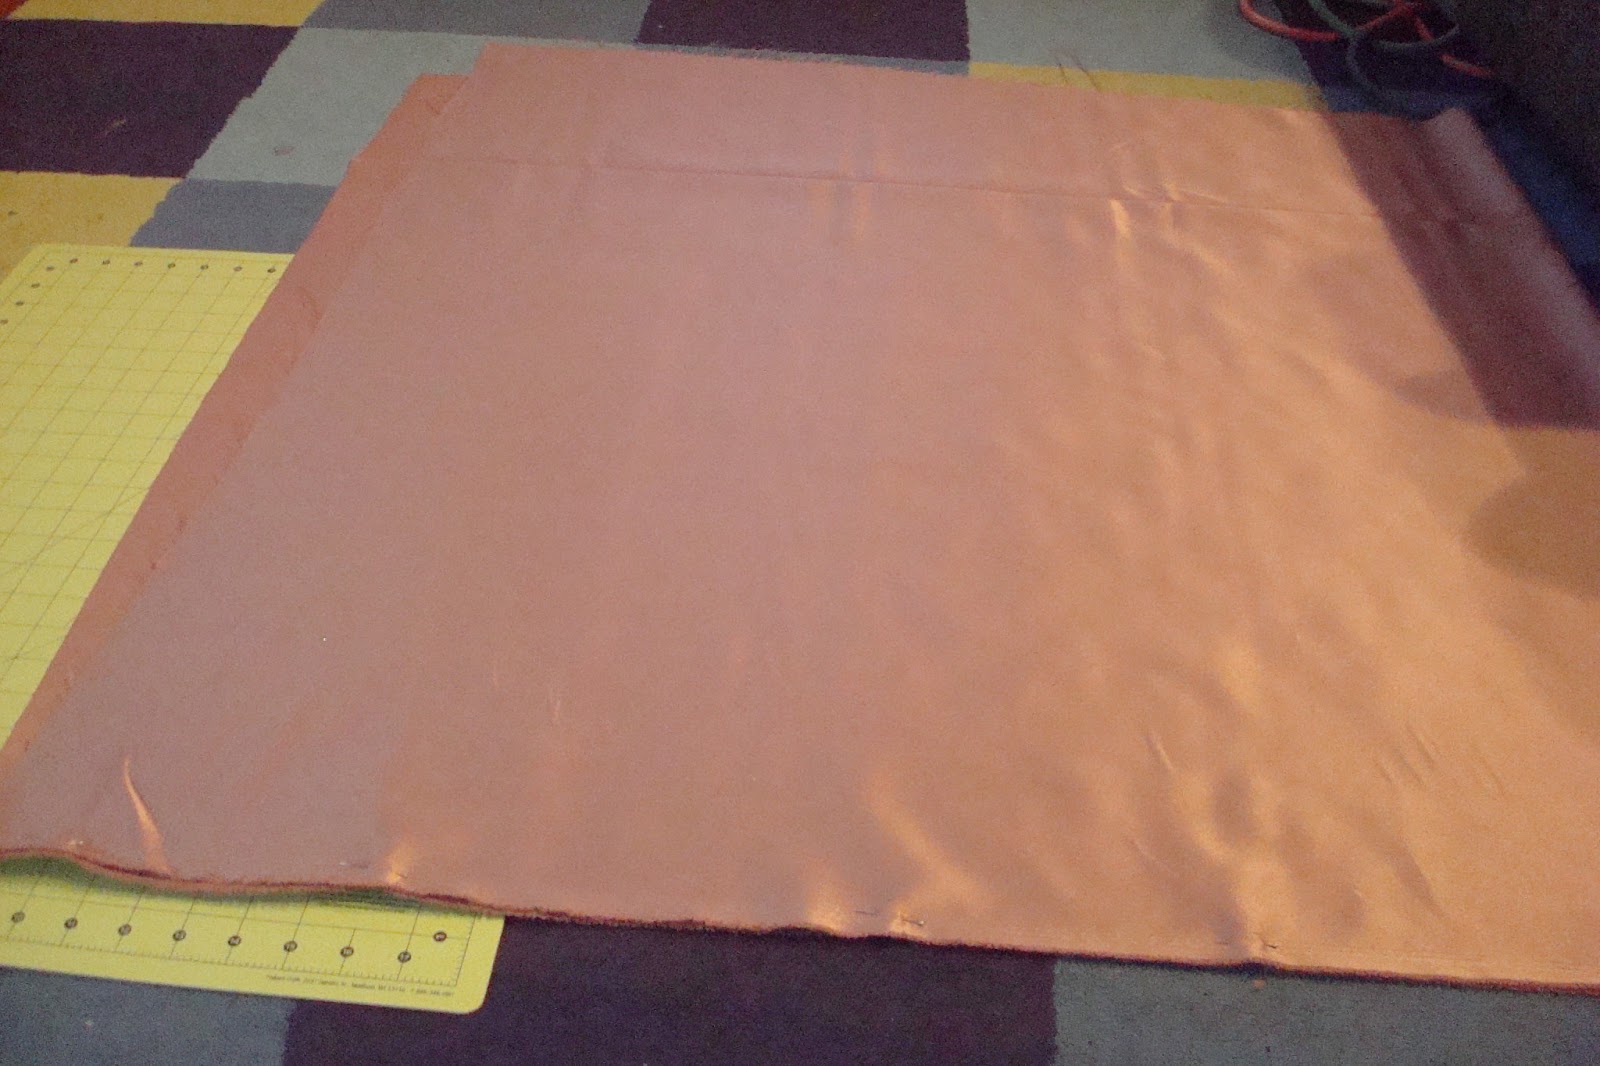
Cape: Mara tends to wear either a cream-colored hood or a slightly darker tan cape that ends around knee level. I re-created the cape using two yards of backing satin in "Latte" from Joann's Fabrics. Backing satin will be labeled as exactly that and is a great choice when you're building a science fiction costume. It's inexpensive, durable, fairly lightweight, and has a nice sheen to it. The only thing it doesn't do well is stretch and the fabric is prone to fraying at the edges if you leave the hems unfinished.
To make the cape, fold the cloth in half length-wise. If this is freshly cut fabric (i.e. you had the salesgirl at Joann's cut you off two yards), you'll likely need to trim at least 2 of the edges so you'll end up with a square. Pin the edges that you know are even (typically the top and the folded edge), then make your cuts to the other two sides until you have your square.


Once you have a square, remove the pins from the folded edge and transfer them across to the just-cut edge immediately opposite the fold. Now, using whatever method you prefer, determine a 45 degree angle beginning at the corner of the top and folded edges and stretching across to the opposite corner. Using this angle as the "swing point" (like on a compass), draw a quarter of a circle between the folded edge and the top of the cape. This is going to be where the cape eventually lays against your neck. I started with a three inch (7.62 cm) radius for this quarter-circle and made small subsequent adjustments. If you're at a loss as to where to get a good approximate radius, have a friend measure straight across the back of the base of your neck and divide that number by two.


 Cut out the quarter-circle once you're satisfied with the measurements. After this, you can finish the seams with a sewing machine or with careful application of hot glue (rolling back the fabric a small amount and gluing it in place). Either glue or sew small segments of cord at the opening of the neckline so you can tie them together to wear the cape.


Utility Belt: The belt itself actually has two segments: a piece that goes around the waist and a harness that encompasses both arms at the shoulders. For both belts, I began with two sheets of light brown upholstery leather from the same company that provided the leather to make Aayla's utility belt. I cut three strips (1.5 inches [3.81cm] wide by 24 inches [60.96 cm] long) and sewed one and a half strips together for the primary waist belt, then appended the remainder to drape along my right side.
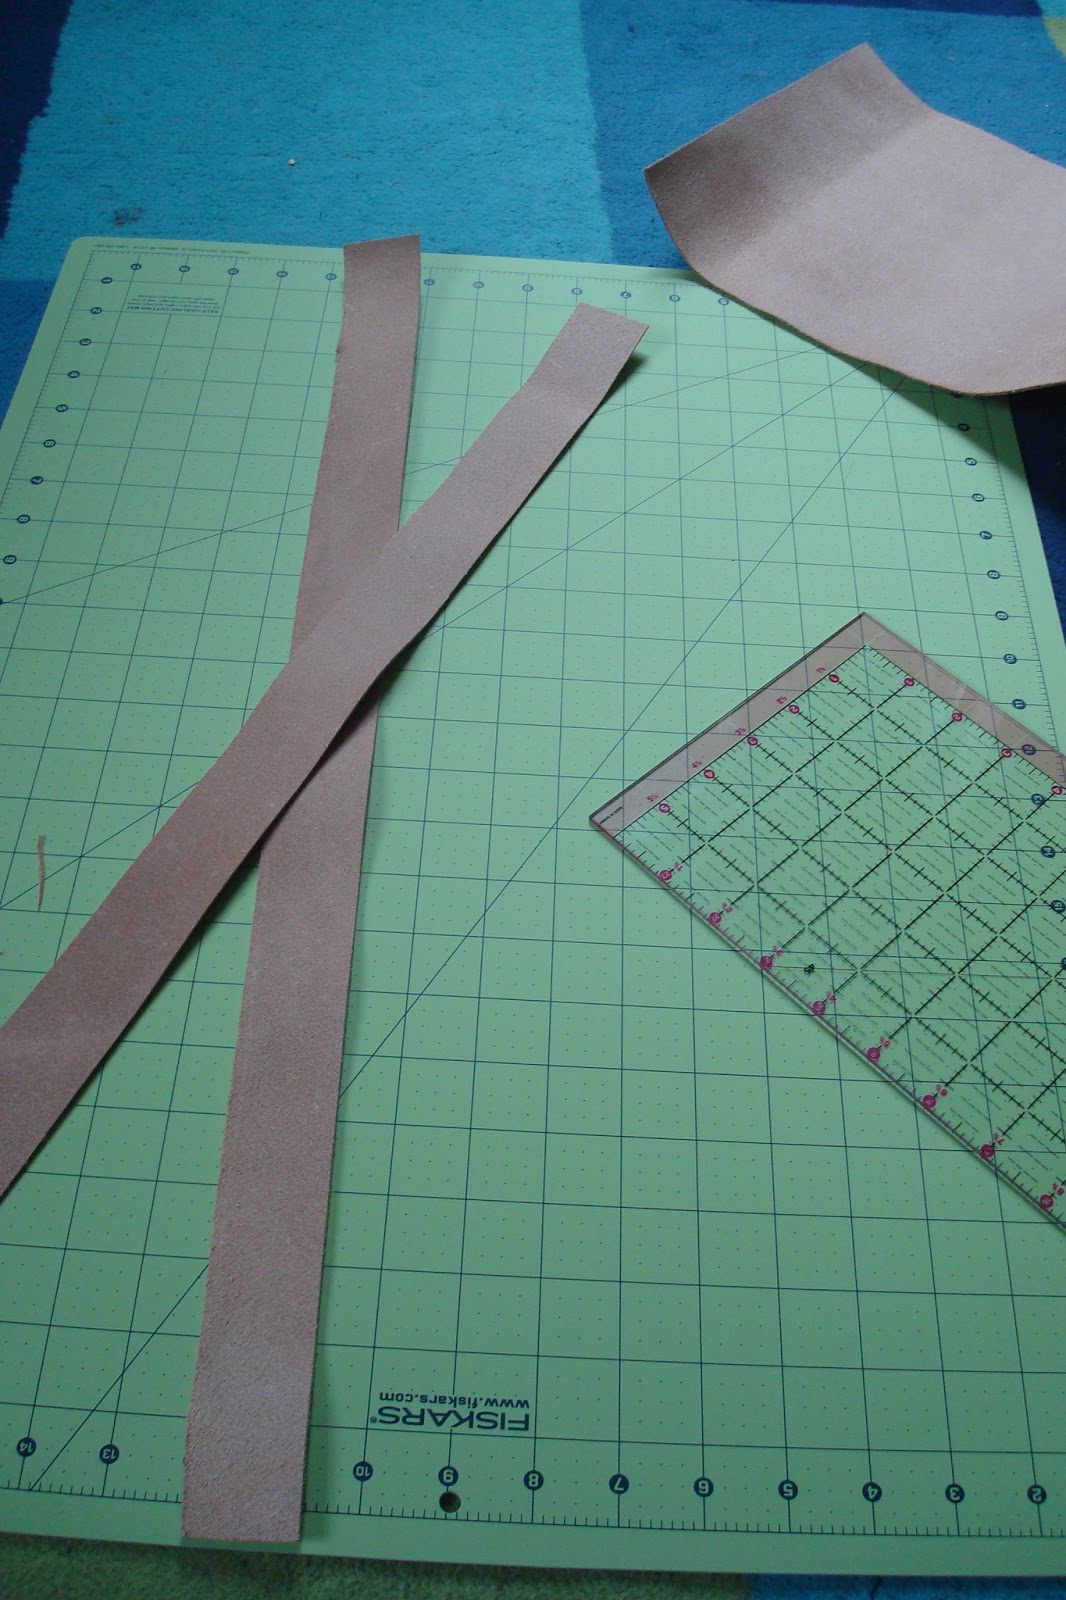
For the shoulder harness the strips needed to be slightly narrower (1 inch, 2.54 cm) in order to allow for freedom of movement. The same basic process of sewing to splice the strips together came into play. If you have some on hand, reinforcing the seams with a small amount of rubber cement is almost always a good idea when making these sorts of leather items.

Goggles/Gloves: Unless you happen to be adept at resin casting or plaster molding, you'll likely have to purchase a set of goggles. Fortunately, many sporting goods retailers sell futuristic-looking models fairly inexpensively. I went with these from Amazon.

The gloves are another item you could make yourself, but could also just as easily purchase as they're fairly generic leather gloves without distinctive markings. One thing to note: Mara wears cream-colored gloves to match her hood, if she's wearing that, and black gloves if she's donning her tan cape.

Other Accessories: There are a handful of geometric silver belt buckles/clasps that Mara tends to wear. I re-created these by cutting the desired shapes into sheets of crafting foam, then spray painting them a matte silver.

For shoes, Mara wears plain black leather boots with a square, modest heel. These are another item you could buy, since there's nothing specifically Star Wars about them.

Mara also either carries a snub-nosed blaster pistol or a lightsaber. She's been shown to use lightsabers with blue, violet, and red blades in various media, so you can take your pick (note: the red blade was used while she was still the Emperor's Hand. If you're cosplaying as light side Mara, you should stick with a blue or violet blade.)

Lastly, Mara is known for her full head of red-gold hair. This has been depicted as everything between a light coppery color and a deep auburn, so there's considerable leeway. So long as you end up with unmistakably red hair, you should be good to go. If you wanted to be especially adherent to canon (yes, I'm calling it that until Disney says I can't), Mara has striking green eyes as well. Colored contacts are surprisingly inexpensive, in some cases even free, and take only a bit of practice to get the hang of wearing.

Feel free to send questions, comments, or pictures to any of our social media sites (or in the comments field below)

As always, best of luck and happy cosplaying!
Read More

Nerd Life: On Milestones

So, in the past couple of posts there have been a handful of references to a personal day of note and/or goings on in the second half of this month.

Oh yeah, what's that all about Kel?

A week from today I will be turning 30. No, not 29 for the second time; 3-0.

Normally I'm not especially into celebrating my own birthday. Hell, I usually don't even like to write about myself on here beyond observations and anecdotes that are hopefully of use to you, the reader. The Care and Feeding of Nerds is meant to be an informational exchange on a variety of subjects that fall under the purview of Geekdom, not a LiveJournal and I make a concerted effort to ensure that one does not devolve into the other. However, these posts ostensibly aren't conjured from the ether and sometimes personal experience can touch on a larger phenomenon within Nerdery.


In this case, it's the notion of staring down a numerical threshold that has some measure of social "weight" to it. I say social because I have no illusions about the physical act of aging. Oxidation at the cellular level will occur whether I want it do or not; my ability to fast twitch certainly isn't what it used to be. This sort of biological degradation can be forestalled and ameliorated and concealed for a time, but is ultimately inevitable. Furthermore, the actual number is semi-arbitrary. If I'd been born in another hemisphere, I'd be turning 31.

Given this, my focus is the amorphous concept of aging both in terms of one's own mindset and as an individual being regarded within the public sphere. Public in this case refers to both our nerdy subculture and the muggle populace we interact with every day.

Why does it even matter? You are who you are and to hell with anyone who gives you guff!   

That's true, to an extent. The notion of 'public' interaction might make more sense if you've ever planned a wedding or had a baby. You know that year after you graduated university how far too many people felt it was perfectly fine to shoot you all sorts of invasive questions and unsolicited advice? Yeah, as you reach and plow through various milestones that whole nonsense metastasizes at an exponential rate. Much as you may try to brush it off, this sort of run-on collective consciousness has a way of getting to you.

It's been a while, but if you remember back to last year when we first talked about what defines a nerd/geek, one of the fundamental identifiers was the following: 

-   There are given subjects (or subsets within a subject) that you LOVE. These subjects may be considered 'normal' by an outside observer but, more likely, they are obscure, complex, or not-deemed-age-appropriate by the general populace.

The general consensus by the non-geeky populace is that our fanatical love for the very subject matter that would garner the 'nerd' moniker in the first place is illustrative of our stubborn refusal to grow up. The burgeoning prevalence of the "man-child" archetype, particularly in visual media, is evidence of this. Despite the fact that we are currently in the midst of the Nerdaissance, with arguably more geeky properties breaking into more facets of present culture than ever before, the idea of actually loving and appreciating the source material beyond "I tune in to watch every week" is regarded as obsessive, particularly once you reach a certain age. It's assumed that, by 30, there are far more productive and appropriate ways to with which to spend our time. You should be mowing your lawn and attending PTA meetings, not painting minis or spending an afternoon engrossed in a game of Twilight Imperium.

We've also discussed the fact that our subculture is often fraught with contention when we regard one another's nerd cred, so there's an added layer of friction that we tend to bring on ourselves with regard to our all-important body of geeky knowledge.

Not to get all gender-y on you guys, but this sort of scrutiny tends to be heightened when it's a female caught in the crosshairs of the public gaze. On the one hand, there's the omnipresent potential to have to "prove" yourself as a nerd to your brethren, which does not diminish with time. Concurrently there's this sort of voiceless chorus extolling you to not only to have all facets of your life beautifully tied together, but also to be the anchor and persistent reality check to any male significant other you have (if you happen to be straight). If the "man-child" is the burgeoning stereotype for geeky guys, we nerdy ladies are dealt the role of overwrought harpy pseudo-mother whose sole purpose is to nag our "man-children" into functional adulthood.

Um. How's about no.

Add to all this the deeply conflicting narratives both genders receive throughout their late teens and into their 20s. We're told to live it up and revel in a few decades of youthful freedom, but are then admonished for not having our proverbial shit together by the time we reach 30. As awesome as it would be, we can't have it both ways. But, in all honesty, anyone with two functioning neurons can parse out which of the narratives is sound and which is unadulterated malarkey. Responsibility should be ingrained, not thrust upon you. If you reach your third decade of this life and cannot attend to the consequences of your own actions then there is truly little recourse for you.  Seriously, if I hear "30 is the new 20" one more time I will punch someone in the throat.

30 is not the new 20. 30, regardless of how you finagle or factor or compute it, is still 30. 

What's truly nefarious about this whole rigmarole is that it's all set up to be a series of hyperbolic dichotomies. There's no regard given to the concept of balance outside the HR department of your workplace, nor are various subcultures made to exist on any sort of spectrum. It's a whole bunch of "Are you an adult or are you a nerd?"  "Are you a responsible muggle or a man-child/harpy geek?" "Aren't you a little old to be gaming?"

All that, right there, is complete bullshit.

There is absolutely nothing, aside from laziness, that prevents a person from simultaneously being a comic book fanatic/RPG addict/cosplayer and a homeowner/business professional/good spouse. In fact, many of the skills from some nerdy pastimes could be readily translated into the commercial sphere. We've already seen that we can be a formidable consumer demographic. Moreover, our community, fractured as it can be, would benefit immensely from solid examples of individuals who are both overtly nerdy and "successful" in the traditional sense. We're entirely capable of a rich and balanced existence, we just have to want to make it happen.

Here's to making it happen. To games and costumes, classes and careers, friends and conventions and all this life has to offer.

Here's to you guys, and to making the most of the next decade.
Read More

This Week in Geekdom


Holy hammer of Thor, we're back on a regular posting schedule! There's some fun and potentially exciting stuff scheduled to be posted in the next couple of weeks, including a new costume. So, here's to keeping up the momentum!

We got to start the week with this, perhaps the most geek-tastic David Bowie cover of all time:


TV

That gargantuan collective SQUEE you may have heard earlier today was the simultaneous joyous outcry of millions of Whovians learning that the BBC officially commissioned an eighth season of Dr. Who.

NOVA and PBS are teaming up to produce an hour-long special documentary/expose on the role that technology played in the identification and eventual capture of the Boston Marathon bombers. The program will air on Wednesday, May 29th (check your local listings).

Ever since the White House revealed to us the approximate costs involved in building a Death Star, Trekkies have been itching to see one of their trademark vessels so quantified. Well, wait no more my fine Trek-lovers. This is how much it would cost to build the U.S.S. Enterprise.

Games

Wait, what is this now? EA is actually LISTENING to their customers and doing something about the feedback they receive? It only took years of griping, but EA is finally killing off its unpopular Online Pass program. Starting this month, all new titles will no longer require or feature an Online Pass login. Eh, it's not a method that will allow us to play single-player EA titles offline, but it's something.

If you have not yet done so, you must check out GeoGuessr. I apologize now for the lack of productivity you will experience as a direct result of clicking on that link.

Science/Technology

File this one under "Kickstarter Done Right". Three technologically and philanthropically-minded nerds are in the process of developing a wholly portable backup internet generator that can be used anywhere on the planet. The idea is to have a reliable, secure method for accessing the internet regardless of the surrounding infrastructure. Their compact, highly efficient device can not only act as a much-needed backup for emergency personnel in disaster zones, but also for impoverished areas that currently lack reliable connectivity. Check out both the article and the Kickstarter itself for more on this potentially groundbreaking initiative.

Just a few days ago Google launched its "Google Hangouts" tool to consolidate all of its messaging devices. This in itself was somewhat cool but, in what is becoming Google fashion, the real treat for fans of the big G was trying to find the easter egg in the new digital plug in. Bronies were delighted to discover that said hidden feature made heavy use of the My Little Pony franchise.

Between the 12th and 14th of this week, the Sun released some of the most intense flares in its plasmatic arsenal. Check out the amazing photos of these X-class solar waves.

General Awesomeness

The guys over at Slate, seemingly eager to win a bet, have put together this very detailed comparative "study" of some of the most famous ships in all of science fiction. Bonus: the article features an interactive component that lets you race them against one another.

And, in celebration of the release of Star Trek: Into Darkness, three intrepid microbrewing Canadians  created an Ale to commemorate their favorite Enterprise crew member. The Ale will be available in Canadian public houses later this summer.


Best wishes for an excellent week ahead!
 

Read More

Geeky Crafting: Chainmail


Hi again everyone. Hope you're all having a great week thus far and/or are gearing up for another weekend of geeky blockbuster cinema. The month so far has featured a delightful cavalcade of movies, comics, and games and we have another two weeks of goodness to go. May has also seen my gradual return to run-of-the-mill daily adventuring following a colossal Elder Hydra boss fight and will feature at least one personal day of note before the month is through. (more on the latter in the next post)

Today we're going to dive back in to the Geeky Crafting feature that first debuted on the blog back in February with an introduction to chainmailing. Nearly ubiquitous at conventions and renaissance fairs, chainmail is one of those crafts that is both extremely versatile and seems to exude nerd cred. The vast majority of casual observers will get a peek at a chainmail piece and assume that A) it took approximately forever to make and B) its construction was an extremely difficult endeavor.

Here's the thing, while some forms of chainmailing are quite challenging, the foundation of the craft is actually pretty simple. Is it time consuming? Yes. Does it have to be difficult? Not necessarily.

Chainmailing is fun in the finite, repetitive way that knitting or weaving is fun but takes less active concentration than, say, painting a Warmachine mini. It's great to do when you're slightly fidgety or are navigating that enigmatic period between being awake enough to not want to sleep but too tired to want to start anything new or involved. And, like the aforementioned hobbies, you can wear/use the product of your labor when you've finished. Bonus: you can pretend you're a medieval blacksmith!

There are two primary components necessary to get into chainmailing: pliers and rings.

A quick glance at the pliers section of a craft or hardware store may be initially overwhelming. Pliers come in a dizzying array of sizes and shapes. So which kind are best for our metal-linking needs?    

The best pliers to use for chainmail are small (the handles should fit into the palms of your hands) and will have spring-loaded grips. Say what now? Spring-loaded grips are like power steering for your pliers; they'll return the both halves of the 'nose' of the tool back into an open position once you release them. After working at your chainmail for a few hours, you'll be profoundly grateful for this little bit of help. Without the springs you will have to manually open the pliers, which will undoubtedly result in cramps and twinges up and down your forearms after a while.

You're also going to want to make sure the surfaces inside the 'nose', those that actually pinch together and hold the rings, are smooth. Often you'll see pliers with little ridges on these critical bits of real estate. In any other circumstance these ridges would be a welcome source of friction but, unfortunately, while this feature does help the pliers get a better grip on things, they also tend to mar soft or malleable metals. Since most chainmail links are made of such materials it's usually best to avoid ruining them by using ridged pliers. Exception: if you're forging your own rings from steel or iron, in which case you'll probably need a pair or two of these.

Ok, so we have small pliers with spring-loaded grips and smooth inside surfaces. The last item to consider is the actual 'nose' shape of the tool itself. Most experienced maillers use one or more of three different 'nose' shapes: round nose, flat nose, and chain nose with the general consensus leaning towards the latter two. For most chainmail purposes, flat nose works very well while chain nose and round nose tend to be used for delicate precision work.

Decent pliers are fairly inexpensive (ranging from $3-$15 USD) and you're going to want one pair for each hand. I picked up my pliers on Amazon, they were at my house 3 days later and have served me well since.

Now for the rings. When you're just starting out, the litany of acronyms that are used to categorize and classify chainmail rings can be overwhelming. Most of them are technical terms that describe the gauge (cross-sectional diameter length) of the wire being used and the size of the rings themselves. Here's a quick guide to help decode the more common bits of this guild-speak:

Acronym/Guild-Speak
Definition
ID
Inside diameter. This is a common measure for individual links and describes the diameter of the inner circle of the link.
AR
Aspect ratio. The ratio of link inside diameter (ID) to the diameter of the wire itself.
SWG
Standard Wire Gauge. British Imperial Standard measure of the gauge of the wire used in the links. This is typically used for solid, ferrous metals.
AWG
American Wire Gauge. Similar to the Standard Wire Gauge, but generally used for conductive, nonferrous metals.
Links Per Pound (or kg)
While this is pretty self-explanatory, the thing to look for is a percentage that should accompany the measure. This percentage should be expressed as +/-X% and connotes the approximate quantity of links that may be imperfect or outside the listed base link size. Links Per Pound (kg) will vary based on the type of metal the links are made of.
        
SWG measures for links tend to range from 14-19 with 14 being the thickest and 19 the thinnest gauge. If you're new to chainmailing, I recommend picking up a 1 pound/kg bag of simple aluminum jump rings like these. They're versatile and fairly cheap, so they make ideal practice fodder.

Now that we have the tools and the materials, so let's get down to chainmailing. The basic 'stitch' to master is the European 4-in-1, which comes together as follows.

Step 1: Take 5 individual links. Keep 4 of them closed (or pinch them closed if any are open) and open the 5th. String the 4 closed links onto the open ring, then close this 5th ring. This is the eponymous 4-in-1.

 
Step 2: Make another 'quartet' as in Step 1. When laid flat, each 'quartet' will have two rings that will sit closer to you and two that will sit atop the first pair and be farther from you. The fifth center ring should 'point' away from you, with the top edge of the ring sitting atop the other four.


Step 3: Lay one 'quartet' vertically atop another with the bottom two rings of the top 'quartet' sitting on top of the top two rings of the bottom 'quartet'. The key to stitching the ring together is spotting overlap points (red arrows below). There will be two such points here as we combine two 'quartets'.


Step 4: Open a new ring. Starting from the right-hand side of your stacked 'quartets', thread the new, open link down through the right-hand overlap point and up through the left-hand overlap point. Then close this link. You should now have a 'octet' (eight outer rings bound by three inner rings).

That's essentially it, just making those 'octets', then weaving single open rings through the overlap points. Once you have a couple 'octets' use the same methodology to connect them to make larger sheets.

Be patient with yourself while you practice this. The actions themselves are simple, but it can take time to recognize the pattern or the 'lie' of the rings and get used to handling the pliers. The 4-in-1 is a solid base for chainmail clothing and accommodates other stitches as well.

Once the 4-in-1 becomes second nature, you can try your hand at other stitches. This site has excellent tutorials for a wide variety of patterns.

Best of luck in your chainmailing! Feel free to submit any of your progress or finished pieces to our G+ or Facebook sites!
Read More
Newer Posts Older Posts Home