


Hi again everyone. Hope you're all having a great week thus far and/or are gearing up for another weekend of geeky blockbuster cinema. The month so far has featured a delightful cavalcade of movies, comics, and games and we have another two weeks of goodness to go. May has also seen my gradual return to run-of-the-mill daily adventuring following a colossal Elder Hydra boss fight and will feature at least one personal day of note before the month is through. (more on the latter in the next post)
Today we're going to dive back in to the Geeky Crafting feature that first debuted on the blog back in February with an introduction to chainmailing. Nearly ubiquitous at conventions and renaissance fairs, chainmail is one of those crafts that is both extremely versatile and seems to exude nerd cred. The vast majority of casual observers will get a peek at a chainmail piece and assume that A) it took approximately forever to make and B) its construction was an extremely difficult endeavor.
Here's the thing, while some forms of chainmailing are quite challenging, the foundation of the craft is actually pretty simple. Is it time consuming? Yes. Does it have to be difficult? Not necessarily.
Chainmailing is fun in the finite, repetitive way that knitting or weaving is fun but takes less active concentration than, say, painting a Warmachine mini. It's great to do when you're slightly fidgety or are navigating that enigmatic period between being awake enough to not want to sleep but too tired to want to start anything new or involved. And, like the aforementioned hobbies, you can wear/use the product of your labor when you've finished. Bonus: you can pretend you're a medieval blacksmith!
There are two primary components necessary to get into chainmailing: pliers and rings.

A quick glance at the pliers section of a craft or hardware store may be initially overwhelming. Pliers come in a dizzying array of sizes and shapes. So which kind are best for our metal-linking needs?
The best pliers to use for chainmail are small (the handles should fit into the palms of your hands) and will have spring-loaded grips. Say what now? Spring-loaded grips are like power steering for your pliers; they'll return the both halves of the 'nose' of the tool back into an open position once you release them. After working at your chainmail for a few hours, you'll be profoundly grateful for this little bit of help. Without the springs you will have to manually open the pliers, which will undoubtedly result in cramps and twinges up and down your forearms after a while.
You're also going to want to make sure the surfaces inside the 'nose', those that actually pinch together and hold the rings, are smooth. Often you'll see pliers with little ridges on these critical bits of real estate. In any other circumstance these ridges would be a welcome source of friction but, unfortunately, while this feature does help the pliers get a better grip on things, they also tend to mar soft or malleable metals. Since most chainmail links are made of such materials it's usually best to avoid ruining them by using ridged pliers. Exception: if you're forging your own rings from steel or iron, in which case you'll probably need a pair or two of these.
Ok, so we have small pliers with spring-loaded grips and smooth inside surfaces. The last item to consider is the actual 'nose' shape of the tool itself. Most experienced maillers use one or more of three different 'nose' shapes: round nose, flat nose, and chain nose with the general consensus leaning towards the latter two. For most chainmail purposes, flat nose works very well while chain nose and round nose tend to be used for delicate precision work.
Decent pliers are fairly inexpensive (ranging from $3-$15 USD) and you're going to want one pair for each hand. I picked up my pliers on Amazon, they were at my house 3 days later and have served me well since.
Now for the rings. When you're just starting out, the litany of acronyms that are used to categorize and classify chainmail rings can be overwhelming. Most of them are technical terms that describe the gauge (cross-sectional diameter length) of the wire being used and the size of the rings themselves. Here's a quick guide to help decode the more common bits of this guild-speak:
|
Acronym/Guild-Speak
|
Definition
|
|
ID
|
Inside diameter. This is a common measure for individual links and describes the diameter of the inner circle of the link.
|
|
AR
|
Aspect ratio. The ratio of link inside diameter (ID) to the diameter of the wire itself.
|
|
SWG
|
Standard Wire Gauge. British Imperial Standard measure of the gauge of the wire used in the links. This is typically used for solid, ferrous metals.
|
|
AWG
|
American Wire Gauge. Similar to the Standard Wire Gauge, but generally used for conductive, nonferrous metals.
|
|
Links Per Pound (or kg)
|
While this is pretty self-explanatory, the thing to look for is a percentage that should accompany the measure. This percentage should be expressed as +/-X% and connotes the approximate quantity of links that may be imperfect or outside the listed base link size. Links Per Pound (kg) will vary based on the type of metal the links are made of.
|
SWG measures for links tend to range from 14-19 with 14 being the thickest and 19 the thinnest gauge. If you're new to chainmailing, I recommend picking up a 1 pound/kg bag of simple aluminum jump rings like these. They're versatile and fairly cheap, so they make ideal practice fodder.
Now that we have the tools and the materials, so let's get down to chainmailing. The basic 'stitch' to master is the European 4-in-1, which comes together as follows.
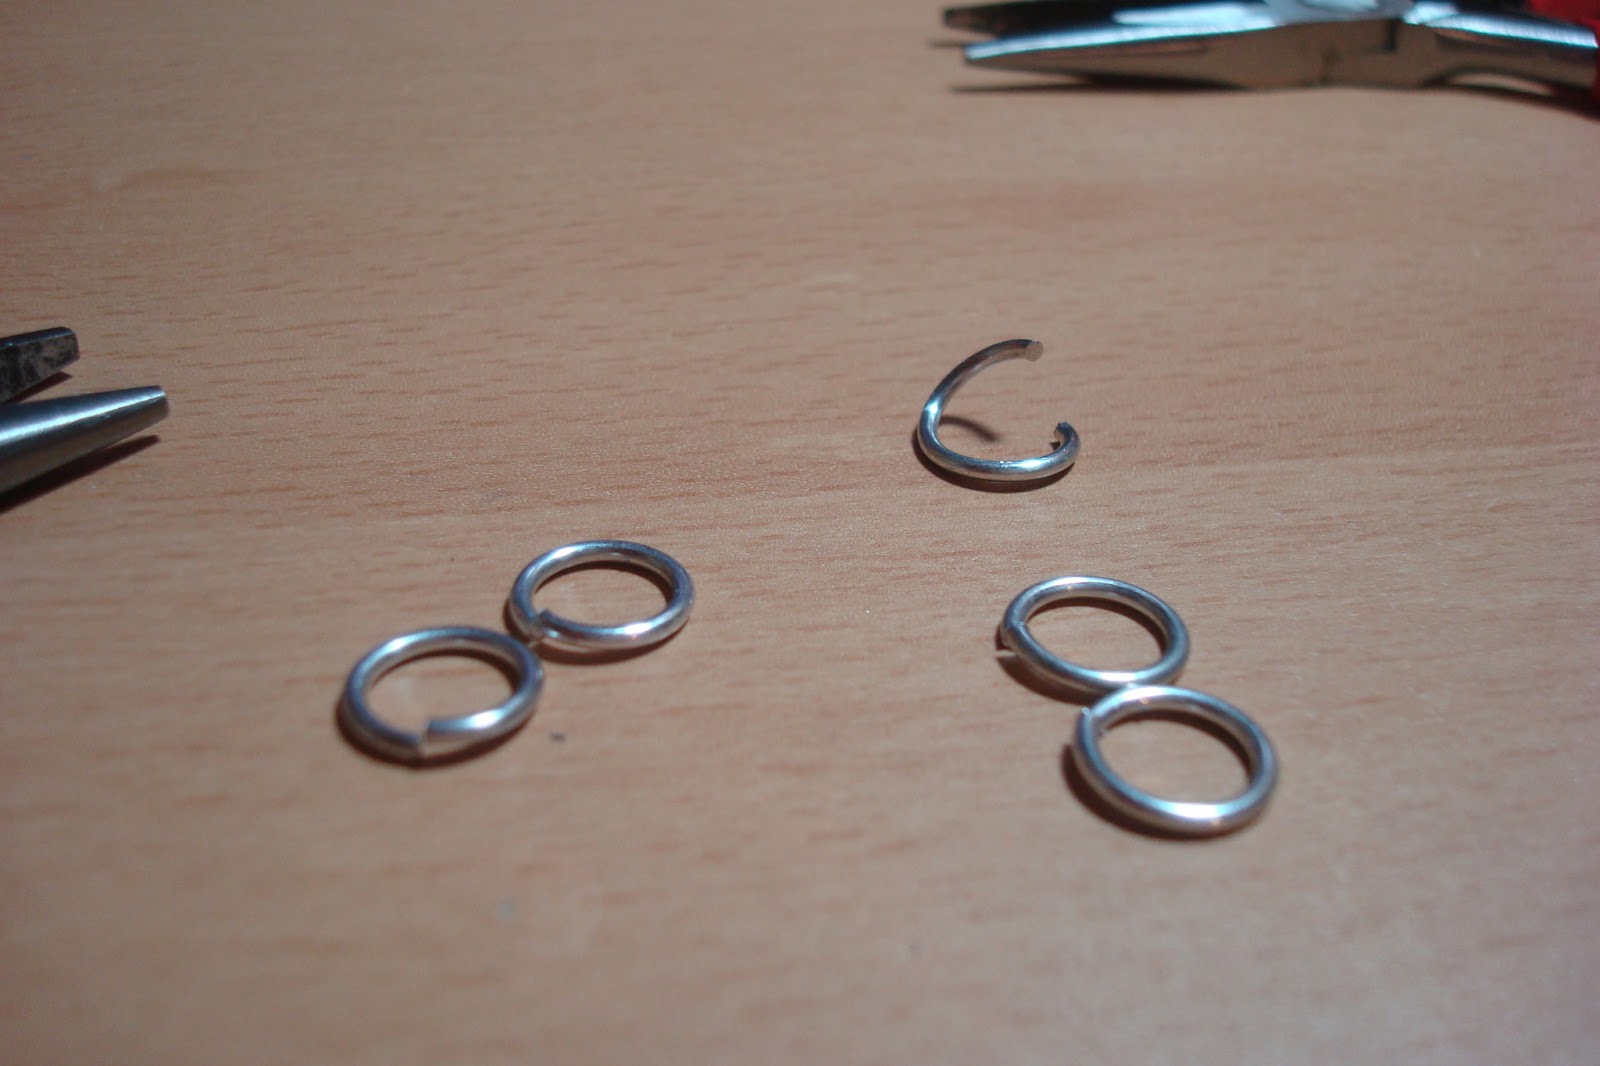
Step 1: Take 5 individual links. Keep 4 of them closed (or pinch them closed if any are open) and open the 5th. String the 4 closed links onto the open ring, then close this 5th ring. This is the eponymous 4-in-1.
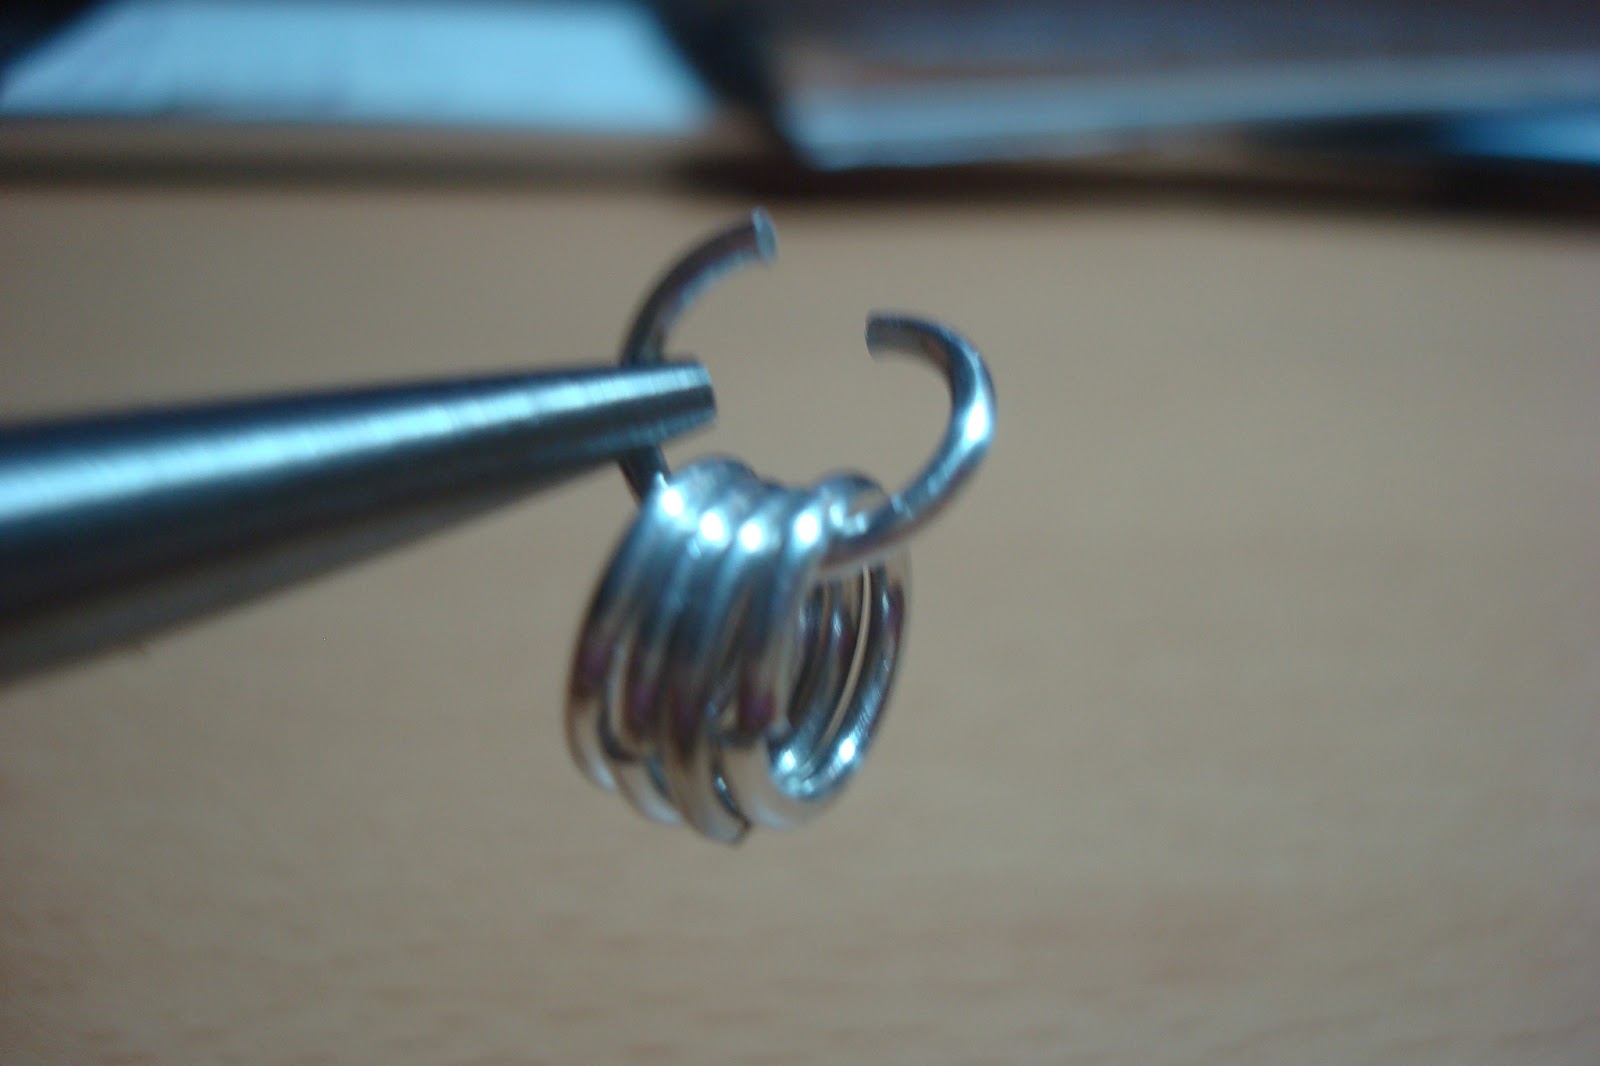
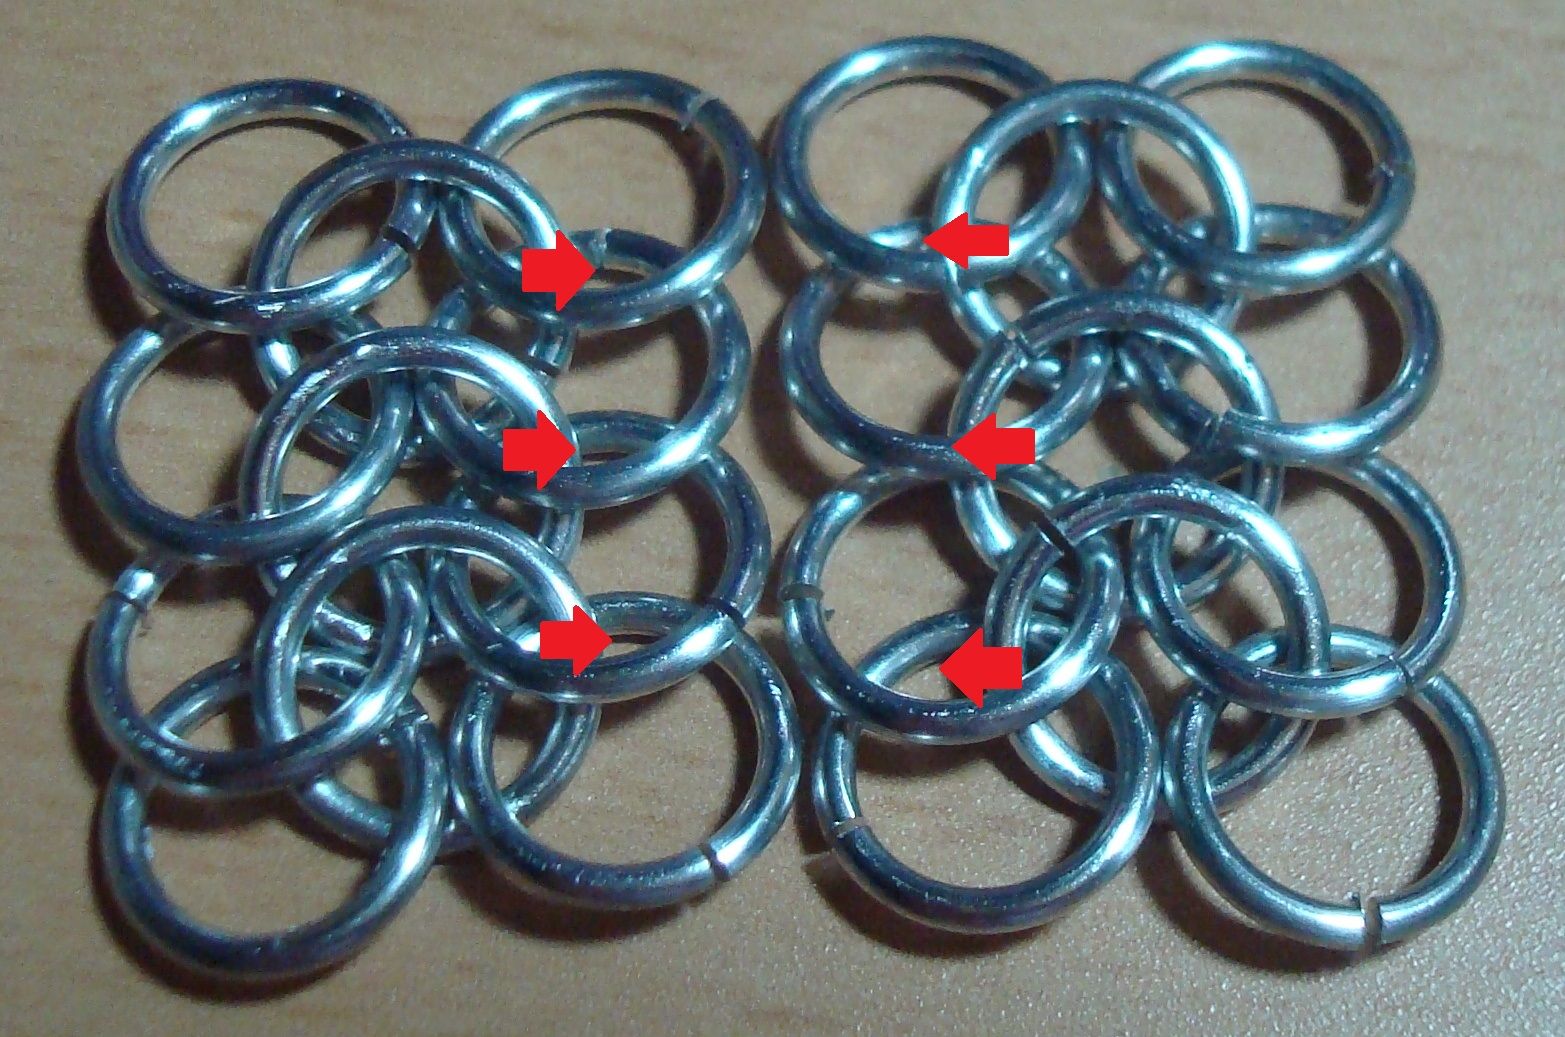
Step 2: Make another 'quartet' as in Step 1. When laid flat, each 'quartet' will have two rings that will sit closer to you and two that will sit atop the first pair and be farther from you. The fifth center ring should 'point' away from you, with the top edge of the ring sitting atop the other four.
Step 3: Lay one 'quartet' vertically atop another with the bottom two rings of the top 'quartet' sitting on top of the top two rings of the bottom 'quartet'. The key to stitching the ring together is spotting overlap points (red arrows below). There will be two such points here as we combine two 'quartets'.


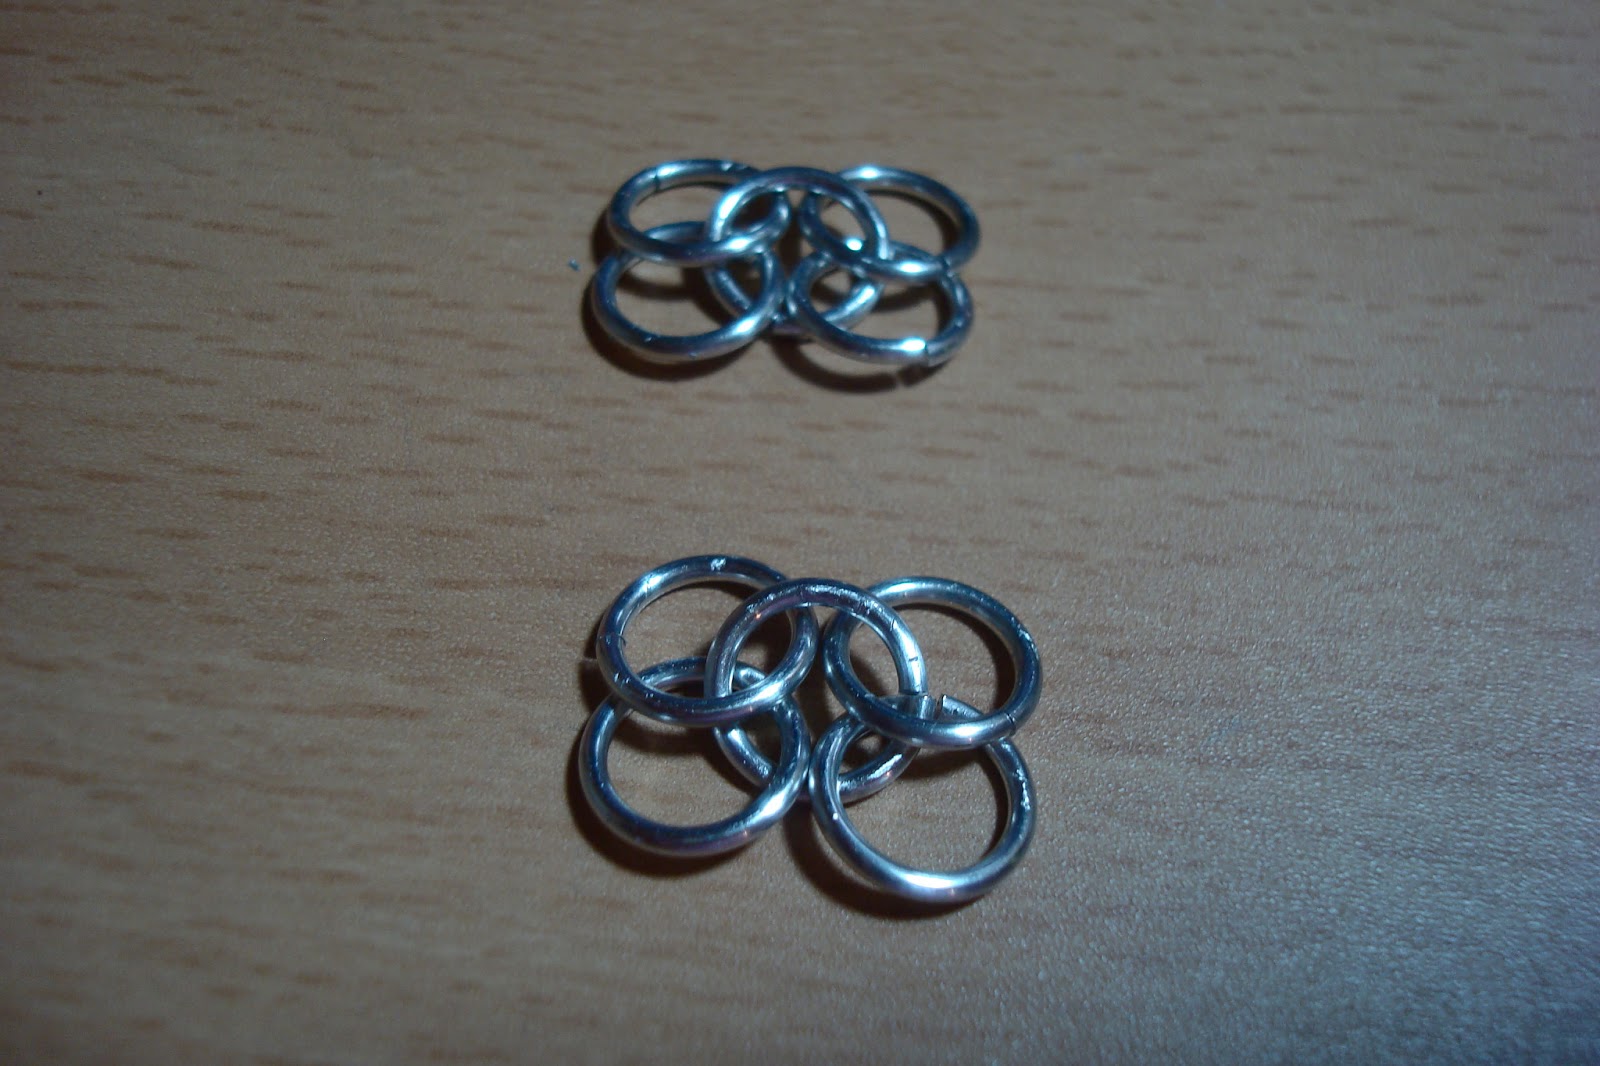
Step 4: Open a new ring. Starting from the right-hand side of your stacked 'quartets', thread the new, open link down through the right-hand overlap point and up through the left-hand overlap point. Then close this link. You should now have a 'octet' (eight outer rings bound by three inner rings).
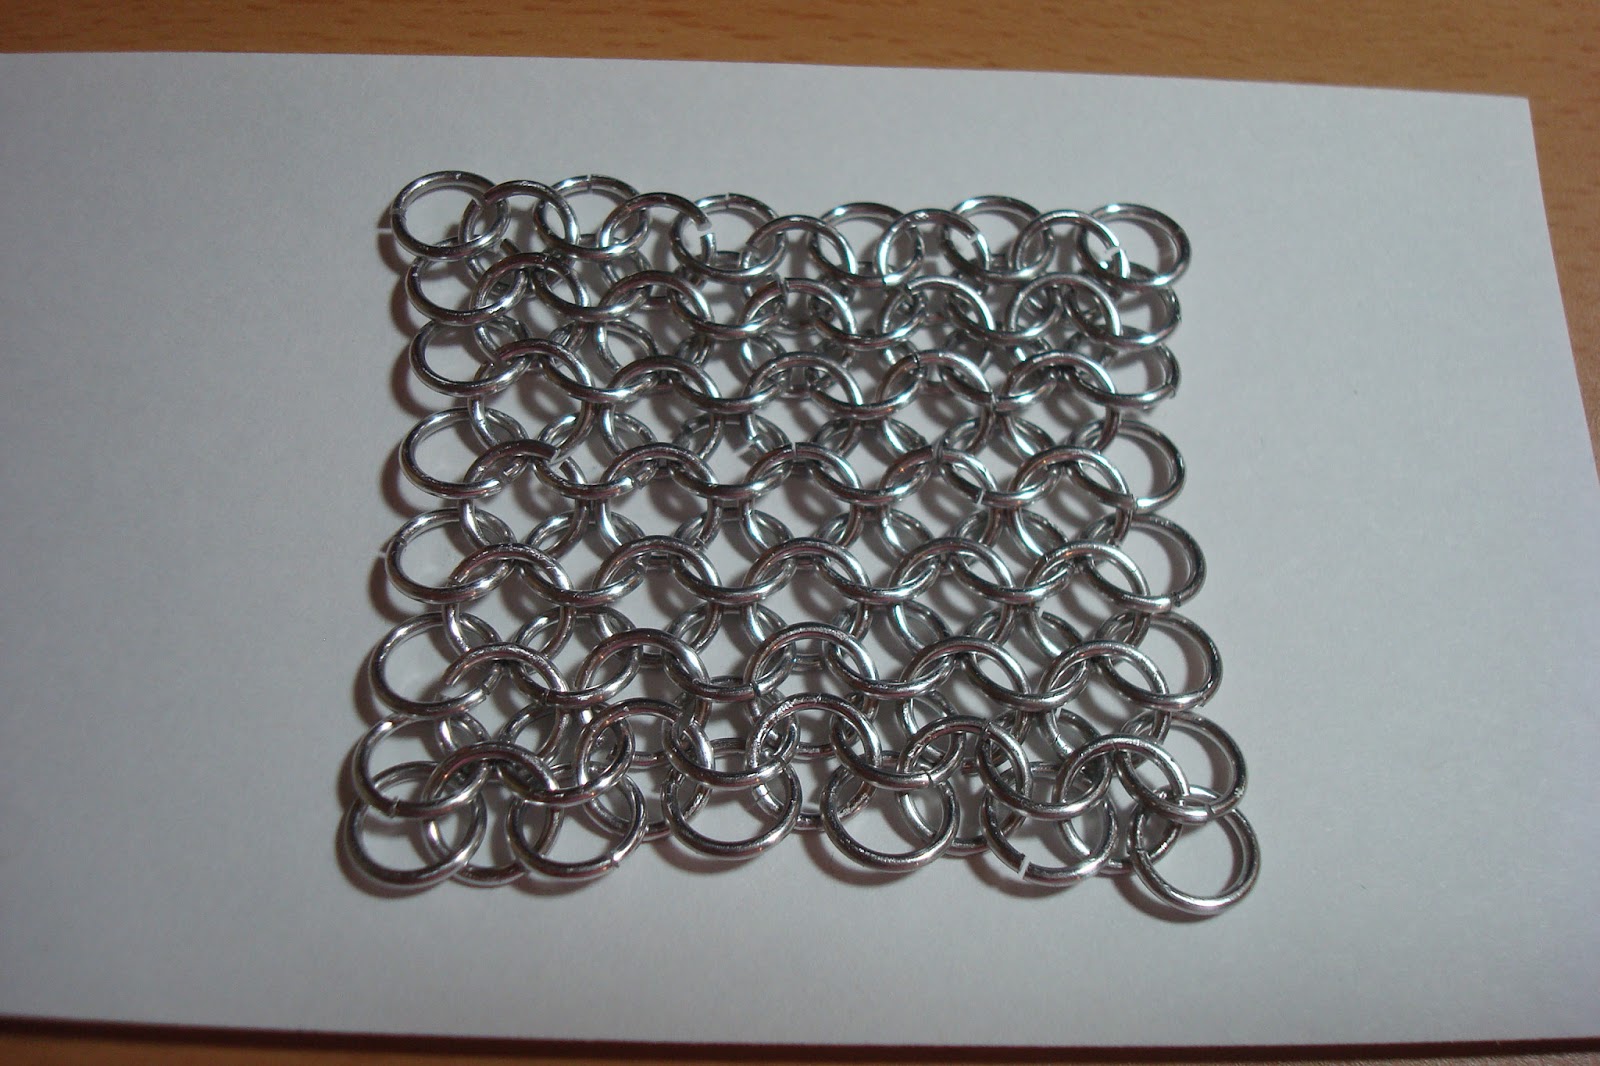
That's essentially it, just making those 'octets', then weaving single open rings through the overlap points. Once you have a couple 'octets' use the same methodology to connect them to make larger sheets.
Be patient with yourself while you practice this. The actions themselves are simple, but it can take time to recognize the pattern or the 'lie' of the rings and get used to handling the pliers. The 4-in-1 is a solid base for chainmail clothing and accommodates other stitches as well.
Once the 4-in-1 becomes second nature, you can try your hand at other stitches. This site has excellent tutorials for a wide variety of patterns.
No comments :
Post a Comment