Showing posts with label frozen yogurt. Show all posts

NomNoms! Chocolate Peanut Butter Eggs

With all the anticipation leading up to and exhausting dénouement from PAX East, it's less than surprising to turn around and see that April is staring us in the face. After a winter that would have appropriate on the continent of Westeros, the prospect of spring seems extra enticing to most New England residents. Though I'm normally not one to devote any particular efforts to the heralding of spring (normally it's "yay more sunshine; boo allergies!"), the notion of indulging in some bright colors and sweet treats after months of frigid darkness and shoveling meters of snow seems well-earned.

In any other circumstances, I'd pass over sweets in favor of something salty but the recipe featured in this post provides a fairly simple way to get that ideal combination of both. Seriously, can you ever go wrong with peanut butter and chocolate? If you can, I don't want to know. Anyhow, around this time of year certain types of candy make their annual appearances on store shelves and in Easter baskets, relish in the confectionary spotlight for a few weeks, then go into hibernation for the rest of the year. Foremost amongst these elusive goodies is the peanut butter egg. Some skeptical/cynical individuals will be quick to point out that you can procure peanut butter cups at any point during the year. Fans of the peanut butter egg will immediately know why their more common siblings are not, and will never be, a viable substitute.

What if I told you that you could have that perfect ratio of chocolate to peanut butter at any point in the year? Now add to that revelation the idea that you could customize this glorious salty-sweet creation to be of any shape, size and color. Bonus: you can have such a thing for almost as much effort as it would take to go out and buy the commercially made version. It's true!

Beginning last October and continuing though…well now I've been tinkering with this recipe and swear on my non-Special Edition copies of the original Star Wars trilogy that it really is easy to do.  Is it time consuming and potentially messy? Sure, but difficult it is not. 6 ingredients and four steps is all that separates you from peanut butter chocolate nirvana.
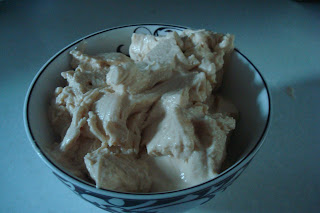
Mmmm...peanut butter nirvana
Difficulty: Easy
Availability of Ingredients: Most Common
Gadgetry: None
Feeds: 4-8 nerds (about 15-20 eggs)
Time Till Noms: About 60 minutes of preparation and an additional 15-30 minutes of active construction

Required Equipment: 1 medium pot or saucepan, 1 large glass bowl, a large spoon (Tablespoon-sized), a wooden spoon, a baking/cookie sheet or two, a carton of wax paper or parchment paper
Optional Equipment: a cookie scoop, a large pot and a smaller pot that can nest atop or just inside the first pot, OR, if you're really fancy, a double boiler/bain-marie.
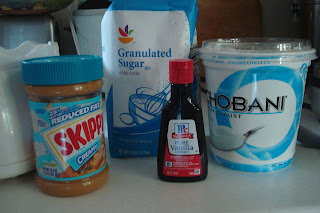
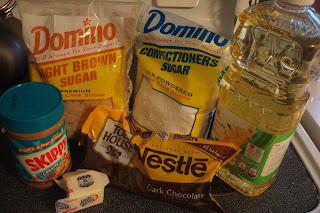
Ingredients

1 cup of creamy peanut butter
1/4 cup of unsalted butter
1/4 cup of light brown sugar
1 1/4 cups powdered (a.k.a. confectioner's) sugar
2 cups of chocolate chips (or 12 ounces of chocolate chopped into small pieces)
2 Tablespoons of vegetable shortening or oil

Step 1: Line your baking/cookie sheet with your wax or parchment paper (enough to cover the flat bottom and rise up a little around the edges), then clear enough space in your refrigerator to accommodate those baking sheets.
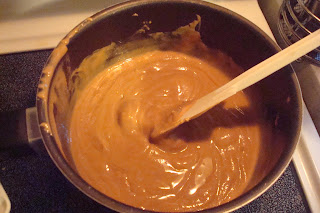
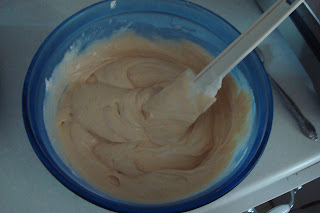
Your filling will go from solid to this state in about a minute

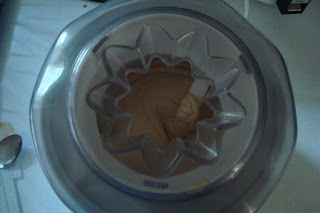
Step 2: Take your peanut butter, actual butter, and brown sugar and toss them into your medium pot/saucepan, then put the pot on your stove and turn the burner to a medium heat.  Remain near the stove and keep a sharp eye on the pot as the ingredients warm up. As they come to temperature, the peanut butter will soften markedly and the butter will melt. Once you see this start to happen, begin stirring the mixture until you get a homogenous, creamy liquid, then transfer the whole thing away from the heat source. After you've moved the pot off the heat, begin adding the powdered sugar to your peanut butter mixture in 1/4 cup increments, stirring until the sugar is fully incorporated into the mixture before adding more. The mixture will get exponentially stiffer and more difficult to stir with each addition of powdered sugar. It shouldn't be too difficult to keep stirring until the last 1/4 cup of sugar. If, for whatever reason, the mixture is being uncooperative, return the pot to a low heat and continue stirring. Once all the sugar has been added and successfully stirred in, leave the mixture to cool to approximately room temperature (about 10-15 minutes).

First 1/4 cup of powdered sugar
3/4 cup of powdered sugar
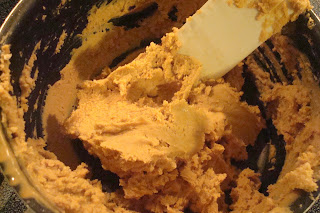
After all 5 quarter cup increments, the filling will look like this
Step 3: Using your large spoon (or cookie scoop), divvy up your peanut butter mixture and place your freshly-scooped spoonfuls onto the paper-coated baking sheet(s). At this point, you can shape the newly-partitioned mixture into whatever shapes you like. The shape you leave the mixture bits in now will be the foundation for the shape of your finished pieces. Once you've divided the entirety of the mixture and sculpted the resulting pieces into the desired shapes place your baking sheet(s) into the vacancy you've made in your fridge and leave them to chill for about 30 minutes.
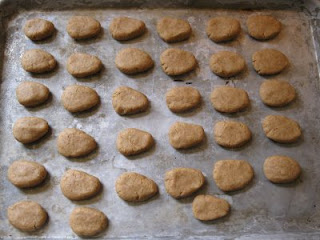
They look so cold. Let's give them a coat...of chocolate!

Step 4 (Easy mode): After your peanut butter shapes have chilled out in the fridge, grab your large glass bowl and toss your chocolate bits and shortening or oil inside. Continue reading if you'd like to proceed on Easy Mode. If you're up for a challenge AND have the optional equipment listed above you can skip ahead to the Advanced instructions.  Place the bowl in the microwave and heat the chocolate in 30-second increments, removing the bowl to stir the contents between heating sessions, until all the chocolate is completely melted. Take your chilled peanut butter pieces out of the fridge and toss them, one by one, into the melted chocolate, using a fork or spoon to turn them until each has an even coating of chocolate. Place the newly chocolate-ified pieces back onto the baking sheet(s) and return them to the refrigerator for 20-30 minutes until the chocolate coating has hardened. Woot! You have yourself a clutch of peanut butter chocolatey goodness!

Step 4 (Advanced mode): Fill your large bowl or the reservoir of your bain-marie about 2/3rds full of water and place on the stove. Put your chocolate into the smaller bowl/active portion of the bain-marie and nest this bowl inside the larger bowl/reservoir so it floats atop the water. Heat the water to gentle boil (think the point just before you'd toss pasta in, so some bubbles but not cascades of them). As the water comes to temperature, the chocolate will slowly begin to melt.  Stir the chocolate intermittently until it has completely melted. Take your chilled peanut butter pieces out of the fridge and toss them, one by one, into the melted chocolate, using a fork or spoon to turn them until each has an even coating of chocolate. Place the newly chocolate-ified pieces back onto the baking sheet(s) and return them to the refrigerator for 20-30 minutes until the chocolate coating has hardened. Woot! You have yourself a clutch of peanut butter chocolatey goodness!
Om nomnomnom!

FAQs

Does it have to be creamy peanut butter?

It doesn't absolutely have to be, but chunky peanut butter will be a bit more difficult to work with (it will take longer to heat evenly when you're making the filling) and will take longer to chill. If you love the idea of a bit of crunch in your creations, I'd recommend using a blend of both creamy and chunky peanut butter and experimenting with the ratios.

What about all natural peanut butter? Is it ok to use?

You can use any peanut butter you want so long as the inherent oils do not separate easily from the solids. Does your peanut butter have a layer of oil sitting on top? If so, maybe save that for a snack or another project (like peanut butter frozen yogurt). The more liquid the peanut butter, the more difficult it's going to be to work with since you ultimately want it to form solid filling at room temperature.

How about almond/cashew/walnut butter? Can I substitute one of these for the peanut butter?

Definitely. As long as they don't separate easily (see the response to the second question in this section) you can substitute, blend, and otherwise experiment with pastes from just about any nut.

Can I use any kind of chocolate for the coating?

Sure thing. Milk, semi-sweet, or dark chocolate (or any combination thereof) will work just fine. You can even use white "chocolate" if you wanted to do some custom decorating. Baking chocolate probably wouldn't be the best thing to use though, unless you sweetened it during the melting process.

Shortening is gross! Do I have to use it?

It honestly depends on how long it will be between the time your peanut butter creations are finished and when they will be eaten. If that lag time is less than a day or so, you can easily substitute oil for the shortening (I do this all the time, since shortening squicks me out). However, if you're making these in advance and need to store them for a couple days then shortening is probably your best bet. We're trying to maintain a solid shape at room temperature and the best way to do that is by using solids. If you're still nonplussed by the idea of tossing hydrogenated fats into your cooking (can't say that I blame you there), then you may want to procure some baking wax. Yes, it's a thing and a thing you can typically find in the baking section of the supermarket. It's a tasteless, paraffin-based compound that forms a nice solid structure at room temperature. NOTE: under NO circumstances should you EVER use butter or margarine. They melt too easily, do not like to hold a shape, and become brittle if put in a refrigerator or freezer.

As always, best of luck and have fun experimenting!
Read More

NomNoms: Pumpkinpalooza!


Despite the fact that this year Christmas seems to have made its earliest foray onto the scene possibly ever (no lie, I saw decorations go up as early as October 18th), there is both a month or so of autumn remaining to us in the Northern Hemisphere and we would be seriously remiss to ignore the seasonal goodies still available. So this week's post is a full-on feature of a consummate fall favorite: the pumpkin. 
My pumpkins! Mine!
In the vegetable kingdom, the pumpkin is a nutritional powerhouse: low in calories but packed with fiber, vitamin A AND flavonoid polyphenolic antioxidants (xanthin ftw!). It's highly versatile, capable of taking on either savory or sweet recipe profiles, and features prominently in many a holiday meal here in the states. The color alone will make pretty much any dish featuring this otherwise humble gourd the focal point of the table. Bonus: pumpkin is up there with the most forgiving of ingredients so I included not one, but three recipes for your kitchen experimenting pleasure.  

Pumpkin Pie
Difficulty: Easy
Availability of Ingredients: Common
Gadgetry: Optional, but recommended
Feeds: 4-8 nerds
Time Till Noms: About 90 minutes (30 minutes of preparation and an hour of bake time)

Required Equipment: A large glass or metal bowl, measuring spoons, a spatula, a pie plate (if not using pre-made graham cracker crust), a cookie sheet, an electric hand mixer.
Optional Equipment: A stand mixer

Ingredients
2 eggs
1/2 cup of granulated sugar
1/2 cup of brown sugar
1 Tablespoon of flour
1 teaspoon of ground cinnamon
1/2 teaspoon of salt
1/4 teaspoon of ground nutmeg
1/4 teaspoon of ground ginger
2 cups of pureed pumpkin
1 can of evaporated milk
1 9 inch (22.86cm) round of pie dough OR 1 tin of pre-made graham cracker crust

*Set your oven to 450 degrees Fahrenheit (232.2 degrees Celsius)*

Crack the two eggs into your bowl, then beat them slightly (until the yolks are thoroughly broken, but not so much that the whites begin to stiffen). Then combine the remaining ingredients exactly in the order listed above, mixing to approximate uniformity with each addition. The resulting blend will be very liquid and will exactly fit a 9 inch (22.86cm) pie plate. If you are using dough, place this into your pie plate and, using a fork, make about a dozen impressions into the dough with the tines (just an impression, not so much as to poke all the way through the dough). Pour the filling into the dough, then place carefully into the oven. Bake the pie for 10 minutes, then carefully remove from the oven. Lower the heat to 350 degrees Fahrenheit (177 degrees Celsius), then return the pie to the oven and bake for an additional 50 minutes.

A few quick notes on this recipe:

  • You want to introduce as much air as possible into the pie filling as you are adding the ingredients. Adding lots of air will result in a sinfully smooth, almost velveteen texture that will have people asking how on earth you did this. For this reason, I highly recommend using a stand mixer if you can get a hold of one. If that's not possible, an electric hand mixer will do. Only use a whisk if there are no other options available to you. The pie will still taste good, but it will be denser and will lack that coveted airy texture.
  •  For easy handling of the pie once it's been in the oven, put the pie plate on a cookie sheet.
  • You can use either canned pumpkin or pureed pumpkin that you've made yourself. Do NOT use canned pumpkin pie filling.
  • Making graham cracker crust from scratch is actually pretty easy if you wanted to give it a go. I typically use this method and recommend doing so right before you start making the filling, as graham crackers go stale quickly.


Pumpkin Bread

Difficulty: Noob
Availability of Ingredients: Common
Gadgetry: None
Feeds: 3-4 nerds
Time Till Noms: About 75 minutes (15 minutes of preparation and an hour of bake time)

Required Equipment: A large mixing bowl, measuring spoons, a large wooden spoon, a spatula, a loaf pan.
Optional Equipment: None

Ingredients

1.5 cups of flour
1/2 teaspoon of salt
1 cup granulated sugar
1 teaspoon of baking soda
1 can pumpkin
1/2 cup canola oil
2 eggs
1/4 teaspoon of each of the following ground spices: cinnamon, nutmeg, allspice, cloves
1 pinch of ground ginger
sprayable cooking oil/cooking spray

*Set your oven to 350 degrees Fahrenheit (177 degrees Celsius)*

Combine the dry ingredients, then add the wet ingredients. Stir until the mixture is well blended (it should look like thick orange brownie batter). Using your sprayable cooking oil, spritz the inside of your loaf pan until it has a thin, even coating. Now pour the bread mix into the loaf pan and put the pan into the oven. Let the bread bake for 1 hour. The bread is done when it begins to pull away from the sides of the loaf pan and a toothpick inserted in the center can be removed cleanly.


Pumpkin Frozen Yogurt

Difficulty: Noob
Availability of Ingredients: Common
Gadgetry: Optional
Feeds: 1-4 nerds
Time Till Noms: About 20 minutes if using an ice cream maker, about 60-120 if using other means.

Required Equipment: A large glass or metal bowl, a large spoon, measuring spoons, a spatula (and a whisk if not using an ice cream maker), an ice cream maker.
Optional Equipment: None

Ingredients
1 cup non-fat standard yogurt
2 cups 2% milkfat Greek yogurt
1/2 cup granulated sugar
1/4 cup pumpkin puree
1 teaspoon vanilla extract
1/2 teaspoon pumpkin pie spice*

*You can typically find this in your spice section of your local grocer. If there's none to be had, you can substitute 1/8th of a teaspoon of each of the following ground spices: cinnamon, nutmeg, allspice, cloves, and ginger.

Combine the ingredients in your mixing bowl until the sugar is wholly dissolved, then give it a quick taste test. Akin to our friend, peanut butter fro-yo, this recipe is a base that you can modify to your heart's content before setting it to chill.  

If You're Using and Ice Cream Maker: Add your concoction to the chilled drum of the ice cream maker. Turn it on and leave it to churn for 18-20 minutes (time will vary slightly based on the model of your maker). Remove your freshly chilled noms from the drum. Woot for frozen goodies in the fall!

If you're NOT Using an Ice Cream Maker: Using your whisk, mix the ingredients together for 20-30 seconds, then put the entire bowl in the freezer. Wait 20 minutes, remove from the freezer and whisk again. Repeat this process until the yogurt takes on a semi-frozen state (it will be physically resistant to your mixing). Once the yogurt reaches this state then give a woot for frozen goodies in the fall!

A few quick notes on this recipe:

  • Feel free to experiment with other types of yogurt if you'd like, but I highly recommend starting with the 1:2 ratio of standard to Greek yogurt to get a handle on how the dessert is going to taste. Since the pumpkin has an intrinsic sweetness to it, the tartness of the standard yogurt tends to counter it nicely.
  • If you didn't want to use vanilla extract for any reason, golden spiced rum serves as a perfect substitute. However, just as with our peanut butter frozen yogurt, some sort of alcohol base is required to prevent our dessert from turning into a solid brick once we chill it.


Happy kitcheny experimentation and Happy Thanksgiving to those celebrating this week!
Read More

NomNoms! How to Make Peanut Butter Frozen Yogurt


What an amazing week for science! The past 5-7 days have given us a fairly epic trifecta of scientific breakthroughs; a banner week for the discipline of physics if ever there was one. Aside from confirmation that the Higgs boson was detected at a 5+ σ level of confidence, we were treated to robots that could be directed and controlled solely by the power of thought AND the first real convincing "view" of a dark matter filament. It's more than a bit mind-blowing to think that we get to see these developments unfold in the course of our lifetimes (something that even Stephen Hawking didn't think was possible). Major kudos to all those researchers out there busting their humps and brushing off inquiries as to the timetable on the release of a flying car. You almost can't help but wonder what will come next...makes my squishy scientist heart go a little arrhythmic.

Aside from these dramatic exposés, there were literal fireworks as well, this being a holiday week here in the States.  The heat and humidity have been pretty relentless thus far this summer, which is more than slightly unnerving as both my most recent beach read and the book I'm presently working through have catastrophic global warming as a major thematic element (full review on the latter in an upcoming post!). Literary apocalypses notwithstanding, I've been quick to employ these steamy conditions as an excuse to do one of possibly the greatest things you can do as an adult: have ice cream for dinner.

Were it not for the limits of the human metabolism, I'd probably eat ice cream/frozen yogurt for the majority of meals from about April to October and then at intervals for the remainder of the year (oh yeah, crazy New Englander who eats ice cream in the winter = this girl) but, since I'd prefer not to be mistaken for a Hutt, I try to exercise a modicum of restraint when making meals out of frozen treats. One of the best workarounds I've come across to date is the brilliance of homemade frozen yogurt and, specifically, the recipe I'm about to share.

I'm a huge fan of frozen yogurt and honestly like it more than ice cream about 90% of the time, particularly since I procured an ice cream maker and began to experiment with both types of frozen goodness at home. After a trip with friends to a local Pinkberry, I became convinced that I could replicate the seasonal peanut butter flavor that we'd just sampled.  A few hours and some kitchen mad science-ery later...BEHOLD; a rich, creamy, deeply satisfying flavor that adroitly walks that delicate line between savory and sweet. Bonus: it's extremely easy to create, even if you don't have an ice cream maker. The Greek yogurt base paired with the essential proteins, minerals and fatty acids in the peanut butter make for a filling, nutritious treat that is sure to cool you off from the inside out. Without further ado: peanut butter frozen yogurt.


Difficulty: Noob
Availability of Ingredients: Most Common
Gadgetry: Optional
Feeds: 1-4 nerds
Time Till Noms: About 20 minutes if using an ice cream maker, about 60-120 if using other means.

Required Equipment: A large glass or metal bowl, a large spoon, measuring spoons, a spatula (and a whisk if not using an ice cream maker), an ice cream maker.
Optional Equipment: None

Ingredients
4 ingredients for frozen bliss
3-4 cups of non-fat Greek yogurt
1/4 cup of granulated sugar
1 teaspoon of vanilla extract
3-4 rounded Tablespoons of smooth peanut butter

Yep, that's really it; just 4 ingredients. The above list is what I'd consider the maximum quantities for this recipe, which will make more sense in a minute.

Step 1: Scoop 3-4 cups of the Greek yogurt into your glass bowl, depending on how many nerds you're planning on feeding. Add a third to half of the 1/4 cup of sugar and approximately half of the teaspoon of vanilla extract to the yogurt, then stir these three ingredients together until the sugar has completely dissolved.

If your base looks like this you're ready for Step 3
Step 2: Scoop out 2 Tablespoons of peanut butter and stir them into the yogurt mixture until the former is uniformly distributed into the base.

Step 3: Sample your mixture. Since this is a yogurt and not a cream or custard based dessert, you have enormous flexibility as to the degree of tartness or sweetness the fro-yo will have. Following these steps exactly will produce a nutty, but somewhat tart yogurt than can be easily manipulated.

Step 4: Adjust your inputs to taste, mixing thoroughly so the dessert is as homogenous as possible. My personal favorite ratio is 3 cups yogurt to 3.5 Tablespoons of peanut butter, 1 teaspoon of extract, and just under 1/4 cup sugar. This will give you a balance that is just sweet enough to blot out the tartness of the yogurt and simultaneously allow the peanut butter to take the center of the Flavor Stage.

**If you have an ice cream maker, continue to Step 5. If you're doing this by hand, skip ahead to Step Ǿ.
Round and round it goes...

Step 5: Add your concoction to the chilled drum of the ice cream maker. Turn it on and leave it to churn for 18-20 minutes (time will vary slightly based on the model of your maker). Remove your freshly chilled noms from the drum and BOOM, you have yourself some dinner that your parents would never have allowed for!

Step Ǿ: Using your whisk, mix the ingredients together for 20-30 seconds, then put the entire bowl in the freezer. Wait 20 minutes, remove from the freezer and whisk again. Repeat this process until the yogurt takes on a semi-frozen state (it will be physically resistant to your mixing). Once the yogurt reaches this state BOOM, you have yourself some dinner that your parents would never have allowed for!

Best summertime meal ever

Some Recipe FAQs

Do I have to use Greek yogurt for this? Can I use other types of yogurt?
You could certainly use varieties of yogurt other than Greek, but I strongly recommend sticking with Greek (for this specific recipe anyhow). Greek yogurt is less tart than standard yogurt, more structurally sound than Kefir, Australian, or other semi-liquid yogurts, and is richer and creamier than skyr  (Icelandic yogurt). As peanut butter is somewhat savory, the tang of other yogurts tend not to mesh well with it. Furthermore, the balance of high protein content blended with a proportional amount of whey makes the Greek yogurt fabulously creamy, which enhances the overall experience when eating the results of this recipe.

Does it have to be non-fat yogurt?
Nope. You can use 2% or whole fat yogurt if you wanted to. However, the higher the fat content of your creation, the longer it will take to harden to the desired consistency. Fat is, of course, an insulator, whether subcutaneous or in your dessert. Also, there's a not-insignificant amount of fat in the peanut butter, which already lends a degree of richness to the recipe. It's your call though. If you use a higher fat yogurt, start with an extra 5 minutes of churn time if you're using an ice cream maker and add additional increments if needed.

There seems to be a whole lot of stirring going on here, even if I use a machine. Wouldn't it just be easier to pop the yogurt into the freezer and let it sit until it hardens?
Well yeah, that would be easier, but you'd most likely end up with subpar results. The stirring, or churning, process is a crucial step to making most types of frozen treats (ice cream, fro-yo, gelato, or sorbet) because doing so introduces air into the mixture. Why does that matter? A certain quantity of air in your product enhances the texture by keeping the ingredients in your base looser, which creates creaminess. Soft serve ice cream gets its consistency by having large amounts of air introduced during the churning process. This portion of air is called overrun in the frozen dessert industry and is expressed as follows:

% Overrun = (Volume of Churned Base-Volume of Unchurned Mixture)/Volume of Unchurned Mixture x 100[i]

Cheaper desserts tend to have very high overrun percentages (90% or more) while so-called premium desserts have average overruns between 20-30%, as the latter tends to rely on added butterfat for texture. Bottom line: if you want to have a nice, creamy dessert not filled with icy shards then there's going to have to be some form of stirring involved.

Is the vanilla extract necessary?
The vanilla extract has a two-fold purpose: 1) to act as a flavor booster for the peanut butter and 2) to temper the freezing process. The second entry on that short list is critically important for the creation of all frozen goodies. The alcohol in the extract allows the mixture to harden, but not crystallize, as it has a lower freezing point than the water in the base. You can use any clear alcohol (I recommend rum) as a substitute if you're not a fan of vanilla.

As with all the recipes on here, I encourage experimentation to get the best possible experience tailored to your individual tastes. Best of luck with your kitchen adventures and beating the heat!


[i] From the University of Guelph Department of Dairy Science and Technology http://www.foodsci.uoguelph.ca/dairyedu/overrun.html
Read More
Older Posts Home