


So Gen Con 2015 descended upon us all before I could finish publishing the last few posts covering the making of Steampunk Hawkgirl. This is something that will be rectified post-haste! To recap if you're just joining us now, so far we’ve covered the corset, the leggings, the wing harness, a few Worbla bits, and the supersized feathers that cover the wings. On today’s docket is the Thanagarian’s weapon of choice: the mace.
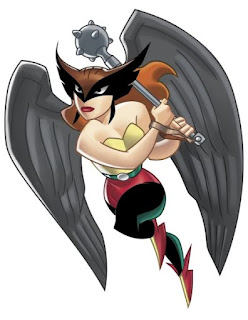
I mentioned a while back that I can’t, for the life of me, draw in any appreciable or useful way, thus leaving me to take a costume from concept to physical reality in a single step. This made for a bit of a challenge when beginning work on a few components of Steampunk Hawkgirl, as there are no canonical reference images to provide guidance, and the mace, for whatever reason, proved difficult for me to put finite ideas to. Hawkgirl’s standard mace is pretty much your run-of-the mill smashy ball with spikes and a handle on it, but how do you go about making that look more steampunk?
After a lot of thought and a similar amount of research on the internets, I came up with the idea of having the ball part of the mace be a tesla coil/plasma sphere and replace the traditional spikes with arching tracts of gear teeth. While the concept was exciting, it would be a bit tricky to make real. There would be a handful of things that would need to be addressed in a hurry.
 |
| All tests went swimmingly |
First on the list of Mace-Related Challenges was finding a tesla coil/plasma ball that was both sufficiently large and could be powered with batteries. There are lots of battery-powered plasma balls out there, but almost all of them have a diameter of 3” (7.62cm) or less, which is a bit too small in terms of proportionality to the rest of the costume. Conversely, there are also lots of larger plasma balls, but they are powered by AC only, making them less than feasible to walk around the convention halls with. Finally, I came across this guy, which could be powered via a big pack of AA batteries. Win.
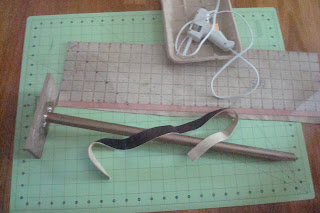
Once the plasma ball and battery pack had been procured it was a question of how they could be reasonably attached to some sort of handle, and it was pretty clear that a custom piece would be in order. To make the handle, I bought a 1/2" wide x 24" (1.27 x 60.96cm) long birch dowel and a small bit of 12" x 4" (30.48 x 10.16cm) birch board, then cut both with the cutting attachment of my Dremel into lengths that would match up to the dimensions of the battery pack and base of the plasma ball. From the remaining birch board I cut a series of trapezoids similar to the sides of the plasma ball that would ‘pinch’ the ball in place and stabilize it so I could carry it around.
The wooden bits, the battery pack, and the plastic sides of the plasma ball all got three coats of gesso. Since all three components are made of different materials, the gesso ended up being an important step in making all the surfaces similar enough when it came time to add paint.
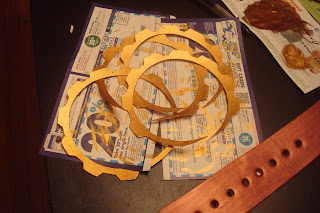
It’s here that I should note that the wood that was used here came from Michael’s and not a hardware store. Why does this matter? Usually wood that’s being sold for crafting purposes has been pre-treated to a degree, so you don’t have to spend time sanding and prepping the fiber before you do things like prime or paint. So just a heads up, if you get your materials from a hardware store you may have to build in a bit of extra time to finish this portion of the costume.All the primed surfaces got a few coats of a brown-copper acrylic paint to give the impression that everything was wrought from a weathered sort of metal. After this, I cut a gear-teeth-like pattern of semi-circles out of Worbla, then gave these the same treatment as the wood/plastic bits.
Once everything had dried it was time to start assembling. Using the Dremel, I cut a 1/4" (0.64cm) hole in the center of the piece of wood that would serve as the primary base for the battery pack and plasma ball. After a quick test run to ensure that the dowel that serves as the handle would fit snuggly into this hole, I marked the very first point where said dowel emerges from beneath the board, then drilled a hole 1/8" (0.32cm) in diameter straight through. A 2" (5.08cm) long zinc eyelet screw was then twisted through the hole so the eyelet itself faced up and flush against the board, lending the latter some support. This arrangement was fixed in place first with a heavy layer of gorilla glue, then with a thinner layer of rubber cement.
For the grip on the handle I took some dark brown leather leftover from my Aayla Secura ‘vest’ (related aside: how on Earth was that costume from three years ago?) and cut it into 1” (2.54cm) wide strips, then wrapped these around the bottom of the handle and fixing the leather in place with hot glue. At the top of the grip, I wound the leather over itself a few times to create the look of a handle. Pretty much any sturdy fabric will work for this and the birch/acrylic paint takes hot glue fairly well.
The last part of the assembly process is a bit tricky and, quite honestly, should probably be left until the last few days before you leave for your convention. The battery pack gets filled (if your plasma ball ends up being the same as mine, the pack requires 20 AA batteries), then attached to the base of the handle with gorilla glue. The plasma ball is then affixed to the battery pack with hot glue so you can pull the former off if you need to replace batteries or make adjustments. Originally I’d intended to use some of the trapezoid wooden cutouts to help stabilize the mace, but they ended up being unnecessary. After that it was just a matter of hot gluing the gear teeth to the base of the plasma ball.

Not gonna lie, the mace is neither light nor is it super stable, but it lights up and presents well. This was one of the more ambitious ideas I’ve had for a prop and I’m really hoping it works out well on the convention floor. We’ll find out soon!
Post-Con Update: Oh this poor mace. My misgivings about its structural integrity ended up being at least semi-founded. Even though the weapon came together as it was supposed to, it stubbornly refused to function after arriving in Indianapolis. I still can't discern exactly what went wrong, but I'm willing to guess that the process of transporting the components of the mace ended up jostling or otherwise internally damaging either the battery pack, the plasma ball, or both. More than a few hours of the night before Cosplay Saturday were spent frantically trying to get the plasma ball to work, but to no avail. Given that the ball was a no-go (and the weapon just didn't look right all darkened), I decided to scrap the mace entirely and walk the convention halls without it.
That being said, if the plasma ball had cooperated/survived the trip out to Indy, the build described in this post would have produced a pretty nifty result. It was disappointing to have to give up on the mace at the last minute, but I'll definitely try to complete the build (or something similar to it) for a future iteration of the costume. Hawkgirl will eventually have her mace!
No comments :
Post a Comment